This post is more for people who already have OL Monitor running on Windows XP and want to move it over to Windows 7. If you are installing Ol Monitor to Windows 7 from scratch nothing here applies.
This post explains all things in detail and assumes you have forgotten everything so it’s pretty long, you may want to print it out first.
So you have been running OL Monitor on XP for years and years, and have invested a fair amount of time getting colors, filters, sorting, and various other tweaks set just right. But now IT insists that you need to switch to Windows 7. This tutorial will walk you through the process of backing up your settings, restoring them to Windows 7, and then dealing with any compatibility issues that may arise.
1. Your settings, where are they?
First thing to check is where your settings are stored right now, there are 3 possible locations. To find out which one from Ol Monitor click options and take note of where the checkmark is:
 <— Here we see that the settings are stored in the INI file.
IF your settings are stored in Local pc , this location is NOT available under Windows 7.
IF your settings are stored in one of the other locations you can skip to the next step but make a note of which location is currently selected.
2. Saving your settings to a different location because you had them saved in ‘Local pc’/’This pc only’:
Settings location topic in help manual: http://www.olmonitor.com/ManualM/window_3_6.htm
The ‘Local pc’ location is not available under Windows 7. So you can save yourself some trouble later by changing the location now to either USER or INI file. You cannot change the location by simply clicking one of the locations from this menu, you need to go into the Options window. Click Options-Options and it will bring you to the Misc tab:
 * ‘This pc only’ means ‘Local pc’
So you can see the ‘This pc only’ button is selected. To write your settings to another location you need only to select one of the other locations. When you select the other location you will see this warning:
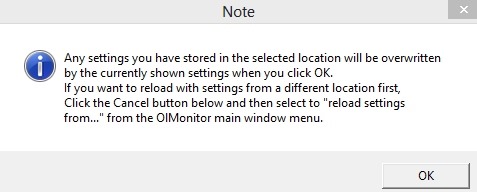
This is ok, we want to write our settings to the new location. There is one possible exception:
A few labs have 2 groups of settings saved to 2 of the locations, say one for night shift and one for days, night shift in INI file and day shift in USER. If you have this setup you will need to go in and export your settings for each location separately.
But most likely you do not have alternate settings setup in one of the other locations.
Click OK and you will see the selected button has changed to the other location. But your settings have not been saved there just yet! You have to click OK or Apply, when you do, your settings will be saved to the new location.
IF you see any error messages after clicking OK or Apply there may have been some problem writing the settings to the new location. Try selecting another location and see if you get any errors.
Now make a note of which location you saved your settings to.
3. Backing up your current settings:
There are 2 ways of backing up setting available to you, I suggest you use both to be safe.
Backup method 1: Go into options to the Misc tab:
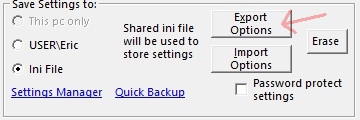
Just click the ‘Export options’ button. A browse window will come up so you can choose where to store the backup file.
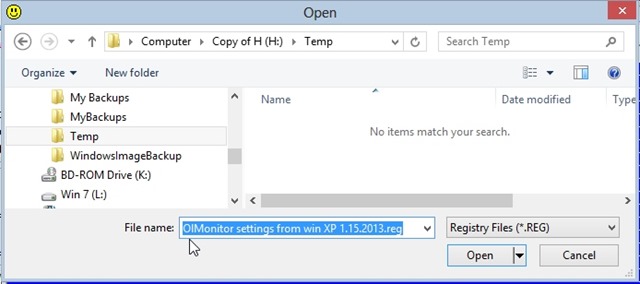
Note: You need to type in the appropriate file extension for the backup type. If exporting from USER use the .reg extension. So your filename will be something like: OlMonitor_Backup.reg
If exporting from INI file put ‘.ini’ as the file extension.
Store the file on a USB drive or a network drive since IT will be re-imaging the pc or giving you a brand new one. It just needs to be somewhere that you will be able to access from the new pc later.
Backup method 2a: Quick backup
Go into options and under the Misc tab, click the blue “Quick Backup” link:
![]() <– All settings will be saved in a dated folder on the pc desktop.
<– All settings will be saved in a dated folder on the pc desktop.
Backup method 2b: Using Ol Monitor Settings Manager
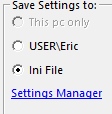
If you have Ol Monitor version 1.80 or above: Simply click the blue link that says ‘Settings Manager’:
If you do not have OL Monitor version 1.80 or higher you will need to install the Settings Manager. Do this now and when done run the Settings Manager program and return to this tutorial. How to install Settings Manager.
Having Settings Manager loaded:
1. Click the cube-magnifying-glass icon. All your current settings will be loaded up, each location in a different tab: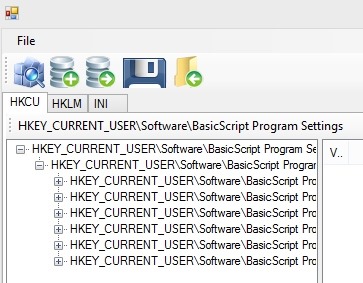
2. Click the Green-arrow-folder icon. A new tab named ‘Backup to folder’ appears. Select this tab:
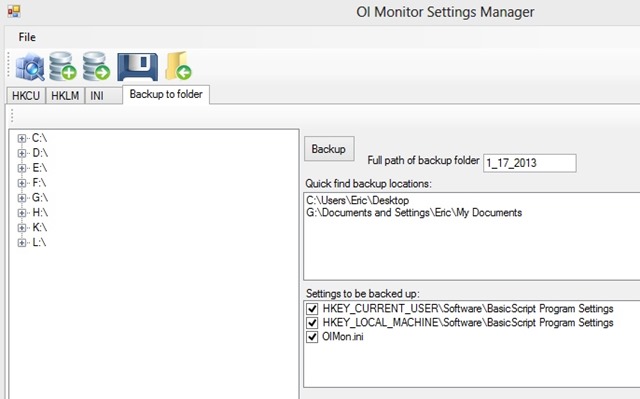
To the left is the list of drives on the system, you can browse to your USB drive or network folder.
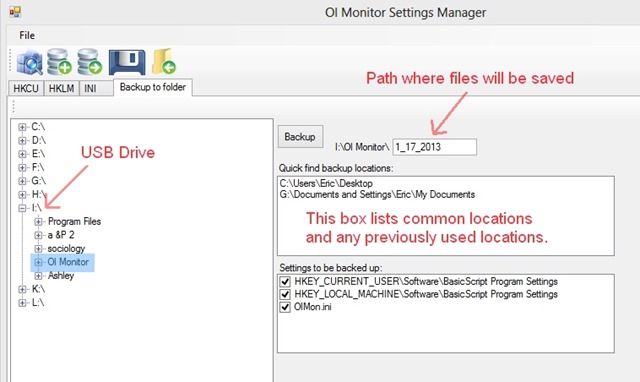
Here you can see I previously made a folder on the USB drive named OL Monitor. You can also just select the root of the drive.
You will see that the date (1_17_2013) is used as a folder name, you can choose your own folder name but the name cannot be blank.
3. Click the ‘Backup’ button and all settings locations will be saved to separate backup files:
Unlike what happens when you click the ‘Export options’ button in OL Monitor, all locations get backed up not just the current one.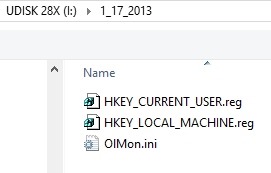
So now you have your precious settings backed up and after the upgrade to Windows 7 you can move on to:
Part II: Restoring your backed up settings to your new Windows 7 installation:
1. If you have not already, install OL Monitor on Windows 7.
2. After you install OL Monitor you will have the default settings. As you can see the ‘Logfiles path’ is in the public users’ folder: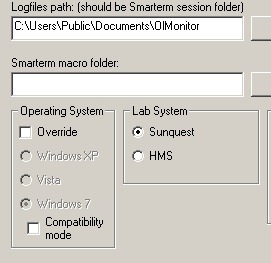
3. Ol Monitor will tell you that you need to input the login and password etc, but we don’t need to worry about that we saved them in our backup!
4. Restoring from your backup:
1. Close OL Monitor for now.
2. Locate your backup(s) you made on the USB key or network location using Windows Explorer.
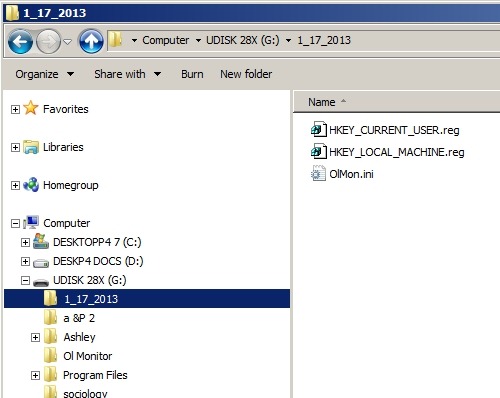
3. This is why it was important to take a note of which settings location was selected back when you were backing up.
4. 2 ways to restore settings: You can double-click on .reg files, for .ini files you cannot.
Restoring from a .reg file in Windows 7
As of this writing (Ol Monitor version 1.81), the Import function does not work for .reg files in Windows 7 (likely due to some security feature).
If you try to import a .reg file from within Ol Monitor you will get this error:
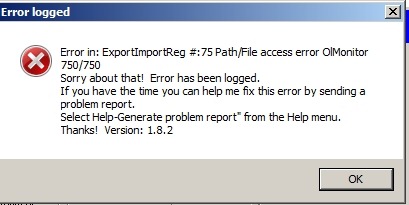
“Error in: ExportImportReg #:75 Path/File access error OlMonitor 750/750”
The workaround is to simply double-click the backup file in Windows Explorer.
Restoring from an .ini file in Windows 7
Before you start it up here’s a quick tip:
Hold down the shift key as you Right-click on the file, in the drop down you will see ‘copy as path’:
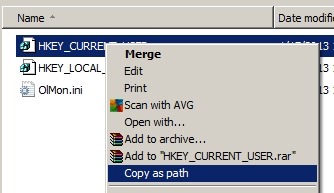
Ok now start OL Monitor and go to the Options window. Make sure that you have selected ‘Ini File’ first. Click on ‘Import Options’:
In the dialog that pops up either browse for the file or paste its path into the File Name field: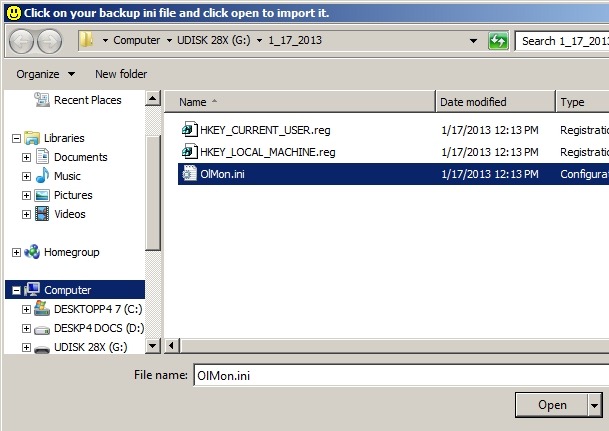
*If you are only seeing .reg files and not .ini files in this dialog, close it out, make sure Ini file is selected as the backup location, click OK and close and restart Ol Monitor.
Getting the settings imported was the hard part, but there are still some things to check.
In our backup file, the file locations were set like this:

Here’s where we can get into trouble, we imported the settings and they wrote over the default file paths. Let’s pull up the advanced tab and see if OL Monitor was smart enough to figure this out:
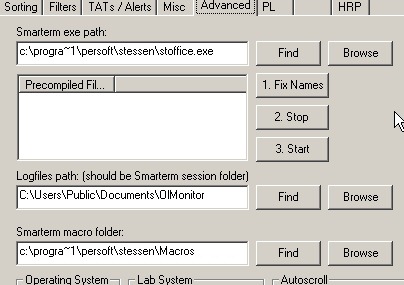
Well it got the logfiles path right, but macro folder and Smarterm exe are wrong.
The exe on my machine should be: C:\Program Files\Esker\SmarTerm\stoffice.exe
The macro folder should have been: C:\Users\Eric\Documents\SmarTerm\Macros
Don’t worry about the stoffice.exe location: OL Monitor will automatically search and locate the exe file on the first run. You will see this:

Ol Monitor quickly locates the exe file and fixes the path.
What about the Macro Folder path? Actually, OL Monitor doesn’t really need to know this, it’s to avoid a rare error that comes up when someone has deleted their default macro file. Ol Monitor already has an alternate method of clearing this error, so it’s really, really not important.
If you want to correct it you can paste in the path for the Smarterm\Macros folder. At this writing (ol monitor v1.81), the find button finds the wrong folder, and the browse option is a little confusing.
That’s it! You’re done. If you run into any issues be sure and contact me so I can update this post for others.