Here are the most current versions of Ol Monitor as of February 14, 2025.
Ol Monitor Version 1.9.3b:
https://1drv.ms/u/s!Au8ELe4GXkEj0YoGTn7hYQJOP2M9lw?e=ojogYh
Ol Monitor Version 2.1.6:
Lab Software
Here are the most current versions of Ol Monitor as of February 14, 2025.
Ol Monitor Version 1.9.3b:
https://1drv.ms/u/s!Au8ELe4GXkEj0YoGTn7hYQJOP2M9lw?e=ojogYh
Ol Monitor Version 2.1.6:
Version 1.x users: You need OL Monitor version 1.9.3c or above to use this feature.
Version 2.x users: You need OL Monitor version 2.1.5a or above to use this feature.
To help with challenges connecting to newly configured servers that have additional prompts, we have added handling to the macro for a second user-defined custom prompt and reply. Space is limited in the OL Monitor configuration screen, so for now using the new feature will require manually editing the .INI file. This article explains how to insert and edit 2 new items into your .INI file.
Note: This article presumes you are familiar with and are using the first custom prompt and reply feature. More info on that feature here:
Step 1:
Open OL Monitor and go into options. In settings location options, select INI file if it is not already selected. Click OK.
From the main OL Monitor screen select Help-Locate OLProcessLog. Click OK on the info box that pops up and close OL Monitor.
Step 2:
A Windows File Explorer window will have launched. In the folder locate the OLMon.INI file and double click to edit in Notepad.
You will see all your settings listed.
Locate the setting named “UserPrompt0” (without quotes)
near it you should also see a setting named “UserReply0”.
We will use these as a template to create 2 similar entries.
Copy the 2 lines and paste a copy of them below. Change the new settings to read ” UserPrompt1″ and “UserReply1”.
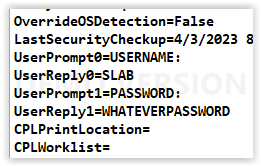
After the = signs on each setting name is the setting value. Edit the values to handle the additional Sunquest server prompts. See example screenshot below:
UserPrompt1=”PASSWORD:”
UserReply1=”WHATEVERPASSWORD”
Note: Be sure the UserPrompt1 matches exactly as the prompt is appearing in Sunquest.
Save and close the file.
Note: This article presumes you are familiar with and are using the first custom prompt and reply feature. More info on that feature here:
Misc tab in Online Manual
http://olmonitorblog.azurewebsites.net/?s=custom
Step 1:
Open OL Monitor and go into options. In settings location options, select .INI file if it is not already selected. Click OK.
From the main OL Monitor screen select Help-Locate OLProcessLog. Click OK on the info box that pops up and close OL Monitor.
Step 2:
A Windows File Explorer window will have launched. In the folder locate the OLMon.INI file and double click to edit in Notepad.
You will see all your settings listed.
Locate the setting named “UserPrompt0” (without quotes).
Near it you should also see a setting named “UserReply0”.
We will use these as a template to create 2 similar entries.
Copy the 2 lines and paste a copy of them below. Change the new settings to read “UserPrompt1” and “UserReply1”.
After the = signs on each setting name is the setting value. Edit the values to handle the additional Sunquest server prompts. See example screenshot below:
Note: Be sure the UserPrompt1 matches exactly as the prompt is appearing in Sunquest.
Save and close the file.
Step 3:
Now you can restart OL Monitor.
When Smarterm launches, click on the Smarterm window to keep it in the foreground.
As the macro launches, it reports its status on the Smarterm terminal window.
During the initial login process, in the upper right corner you should see the values of your first and second custom user prompt/reply combos displayed briefly. (The actual reply value for the second combo is hidden. )
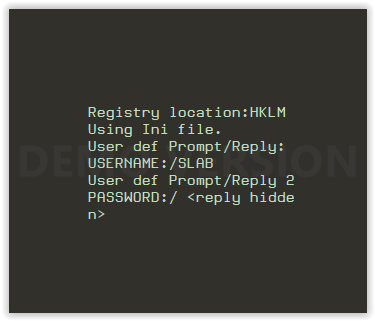
At the same time you can see if the macro is now able to get past the new prompts and login to Sunquest.
If you get login errors, make sure your custom prompts match exactly as they appear on the Sunquest screen, and that the replies you have defined are correct.
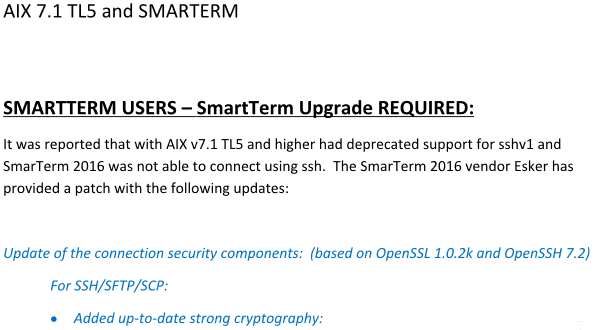
Recently had to deal with an absolutely befuddling problem helping a system that was upgrading to Sunquest 8.2 hosted on a Linux server (using SSH of course).
In the normal process, we simply switch the session type to SSH in OL Monitor:
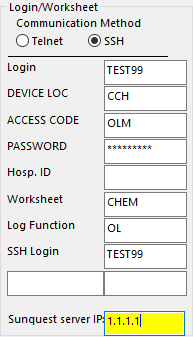
And point the IP to the new server. Sometimes, we have to use the Custom Login/Reply feature to get past an additional server prompt as described here.
If using an older version of Smarterm, you may have to use this method.
However, absolutely none of this was working. If you are having this new problem, here are what the symptoms look like:
Symptoms:
1: Smarterm launches, and you are presented with a new login password challenge such as:

The macro continues but never gets past this line. (Normally we would fix this with the Custom Login/Prompt feature) but we verified the password was being input correctly, yet nothing was happening.
2: Smarterm launches, you are presented with some popups from Smarterm about accepting the crypto key and whatnot, and also a popup asking for password. After successfully entering these, you simply get a blank cursor:
No degree of pressing Enter or F11 gets you past this cursor.
Solution:
The default answer when inquiring about this problem was to upgrade to the latest Smarterm 2016 version. However, after downloading that version from Esker, the problem remained. After an somewhat fruitless exchange with Esker support and an incredible amount of detective work, the LIS manager found a little known patch exists for this very problem:
But there is no link to the patch in this document! Compounded by the fact that accodring to the Esker rep: “SmarTerm support has officially moved to Esker All Access”. So, you need to search for your answer here:
https://esker.influitive.com/join/smarterm
Lucky for you we found the answer here:
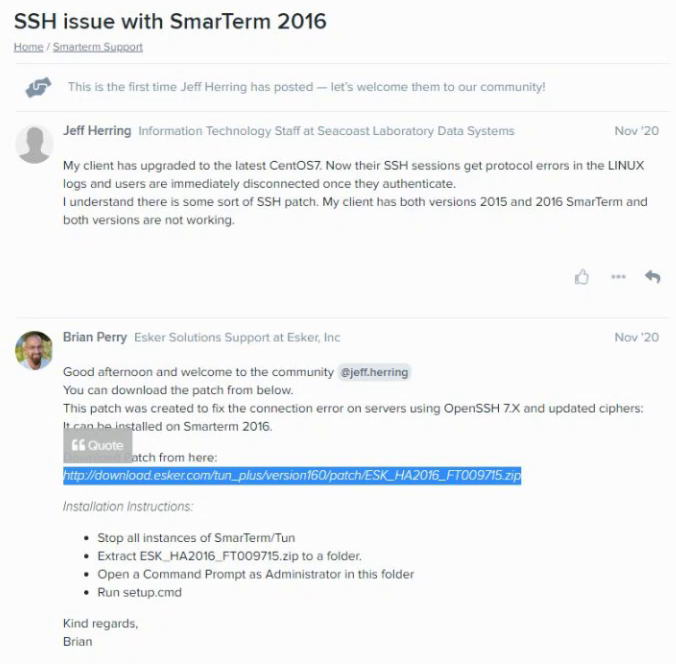
So finally, here is the link to the patch.
http://download.esker.com/tun_plus/version160/patch/ESK_HA2016_FT009715.zip
Brian’s answer is a godsend, but it’s a little sparse on the details:
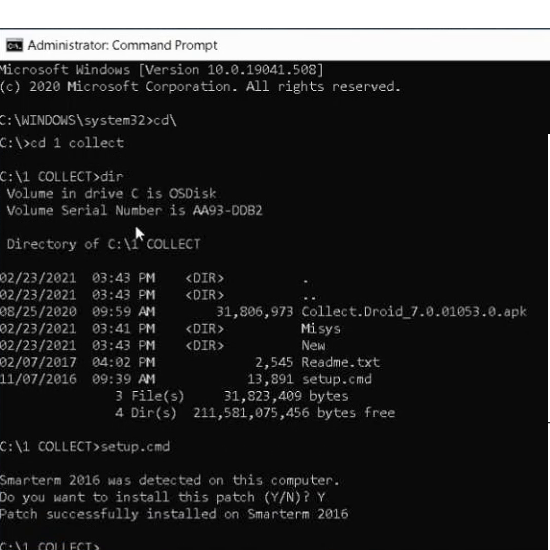
-You MUST run command prompt as Administrator
-The built in Admin account may not have the same network shares as the current user, so you may need to copy the file over to the C drive somewhere.
-According to the bulletin: “Applying this patch to earlier versions is at your own risk, and is frowned upon.” (“Frowned upon” is an interesting word choice, so one wonders if it might work on previous versions? But who would be so bold to court such danger?)
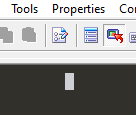
-Not everyone is a DOS command line wiz, so here is a screenshot if you need a walkthrough:

After months of coding the new OL Monitor is ready. 2.0 sports the Windows 10 look and also now supports Windows 7 styles as well. Some key new features have also been added along with one that I had previously believed was not possible. This is just the beginning as more new features will be added soon.

New OL Monitor (bottom picture), supports the Windows 10 flat style. Fonts are easier to read and borders are less jarring. Part of reason for enabling these aesthetic styles was to be compliant with recommended Microsoft program guidelines.
Here is a demo:
But what’s probably really standing out are the row backcolors. This is one of the most commonly requested features. It was previously not possible with the standard Microsoft listview control. This control has been updated and replaced. It is now possible to specify a backcolor with each of your Turn-Around-Times, but that’s not all!
New users of OL Monitor often get confused about the difference between filters and TAT’s. We do coloring with TAT’s and filter in/out tests using filters. Well it’s about to get more confusing (and more fun). There are many situations where you might want to throw in coloring with your inclusive filter. In addition, it would be very useful to use the more flexible filter language to define colors for special situations. Now all that and more is possible. The filter tab now has a new form where you can define a color for your inclusive filter. Or you can define filters that simply affect color, and do not include or exclude a test. How’s that for flexibility?!

The new filter color form allows you to see what your color combo is going to look like. Since there is the possibility of a conflict between the TAT coloring and filter coloring, you can choose whether to override the TAT color.
Notice also that you can have a MessageBar message pop up when the filter condition is met. The possibilities are endless here. You can inform techs about important issues at exactly the right time and under certain conditions. To help the tech quickly identify what test matches the condition, the MessageBar message color will match that of the filter color. Finally these messages will disappear after 15 minutes if not cleared manually, so that the screen does not become cluttered with old information.
I have a few more features planned for this including the ability to add info about the test into the message with variables such as %AccNum% etc.
OL Monitor 2.0 is a major version upgrade and thus is not a free update. Development of further features for OL Monitor 1.X has now ended. Ol Monitor 1.X will still be supported. Any support issue that cannot be resolved quickly (5-10 minutes) via email will require an extended support plan or support ticket opened.
Every January 1st after midnight, OL Monitor incorrectly calculates the ProcTime on previous year’s tests due to the fact that the Collect Times and Receive Times appear in the logfiles as month/day only, not specifying year. Year is pulled from log date but on New Years Day (and beyond if tests hang unresulted) this produces a nonsensical negative number. This was pointed out by a member of the Facebook group: “Medical Laboratory Scientists – MLS/MLT(ASCP), AMT, AAB”. (I highly recommend this group for any MLS’s/MLT’s/Lab personnel as it is very informative and entertaining.) As promised, the bug has now been fixed in version 1.90q.
Before:

After:

This issue hasn’t gotten much attention in the past since labs with OL Monitor typically get tests turned out lightning fast, but finally one tech was fast enough to catch it.
Many thanks to the group member for pointing out this long-ignored bug!
Previous versions of Smarterm had a pretty involved series of steps to save the SSH connection password. This appears to be gone in recent versions and we are presented with a new step in the login process:


So what a lot of people are running into is that the macro will hang up at this point and you start getting errors like
“Stringwait has timed out 4 times. Retrying”, “Loops exceeded, aborting.”, and/or “OL >Report menu loop: timeout”.
The prompt will be different for your server. The workaround to this is to use the custom prompt/reply feature in OL Monitor settings. To resolve the issue:

The macro should reload with the new settings after about 10 seconds but you may still need to close OL Monitor and restart to get the macro working.
Still having issues?:
You can try closing OL Monitor.
Open Smarterm by itself on the machine.
Create a new SSH session to the Sunquest server.
Try to connect, and it will prompt you with the User and Password.
At some point during this, you will be asked to accept the RSA fingerprint to the known HOSTS file, click Yes to all.
See if you can get logged into Sunquest after all this and get to the FUNCTION prompt.
If you can, you don’t need the patch probably and adding that RSA to HOSTS may fix your problem.
If you cannot, and the cursor just hangs and freezes, you need the patch, maybe even need Smarterm 2016 since the patch may or may not work on previous versions.
Still not working?:
Instead of putting the password prompt and reply into the custom login box, put the UserID prompt and reply:

Youtube demo on Updater/Notifier: https://youtu.be/FsPZEVhrKaw
The old updater that was integrated with the installer was having a number of issues. Although it seems to be working now, I felt we could do a lot better. Now included in versions 1.90m and higher is a new and vastly improved updater:
Features of updater:
To use the new updater from OL Monitor (if you have version 1.90m or higher), just click Help-Check for Update:

Don’t have version 1.90m or higher? No problem, you can get it with the Update Notifier tray application! The notifier adds a lot to the updater.
Features:

To learn more about these applications see the online help here:
These apps are for registered users of OL Monitor only, contact me for information.
Symptoms of this problem:
Lately this has been happening more and more. The problem is that the Public folder was designed to be accessible to all users, making it ideal for storing Ol Monitor’s files which are typically shared between users. Sadly the the scourge of malware and viruses have found ways to exploit the geniality of the Public folder. So as part of IT security policy it is getting locked down. So a call to IT may be necessary to restore access to this folder. They can specify which programs need access to the folder and avoid opening it up to all users. The programs which need access are Olmonitor.exe and Stoffice.exe (some other versions of Smarterm may not be named Stoffice.exe)
Below is a workaround that may work for you if you have enough security to change folder access. Otherwise it should give the IT analyst an idea of what the problem is.
OlMonitor needs access to the following folder:
“C:\Users\Public\Documents\OlMonitor”
You may be able to do this yourself or you might need to get IT to do it for you.
Here are some brief instructions if you are familiar with this. Otherwise you may want to get IT to help you because sometimes even if you are an admin user they seem to still restrict certain things.
Browse to the folder:

Right-click OlMonitor and select properties.
In the properties box select security:

Then click Edit and you should get this window:

Click Add and the following box comes up.

This is where it gets a little tricky, you can put your username or email into the box and click Check Names. If you got it right it will underline your name:

Otherwise you will get an error box. You can try using your windows logon name or your email if your system uses that. Another thing you could do is add full control of the folder to the USERS group.
It’s a bit of a hassle and takes trial and error and sometimes you end up having to get IT to help anyway if they haven’t given you total admin power over that pc.

